Lesson 2.2: Using TypeDB Studio
TypeDB Studio is a cross-platform IDE for developing with TypeDB. With Studio, you can do everything necessary to get started with TypeDB: manage databases, build schemas, execute queries, and explore results. We’ll be using Studio to begin with in this course, and later move on to TypeDB’s native language drivers. In this lesson, we’ll get a brief overview of the features we need for this course. A complete introduction to all of TypeDB Studio’s features can be found in the Studio section of the TypeDB Manual.
The Studio interface
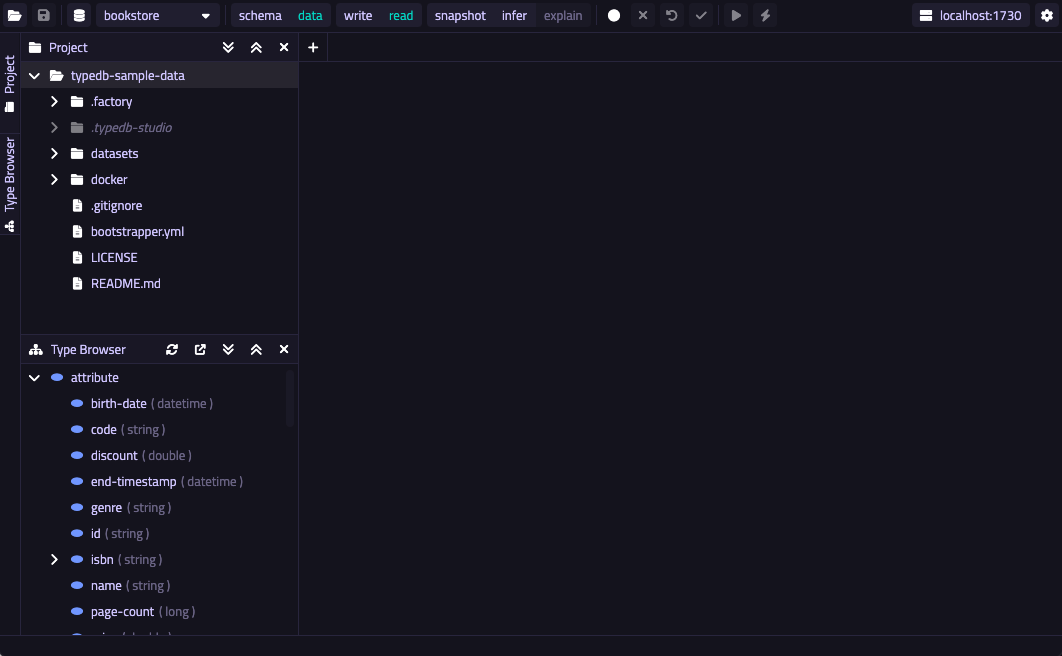
When you start TypeDB Studio, you should see the following interface.
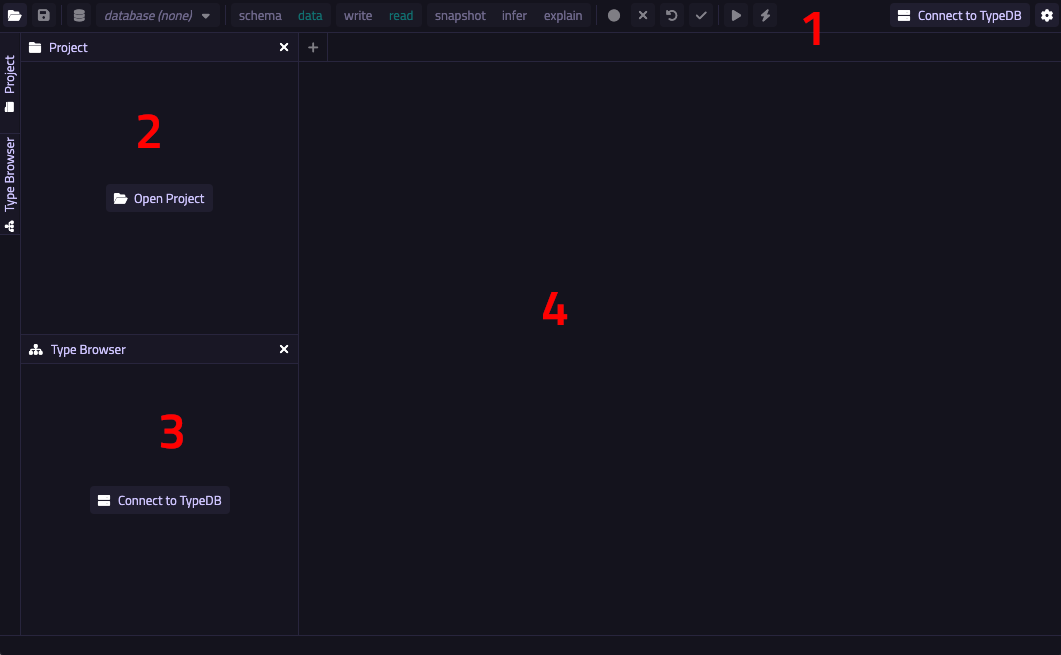
There are four key elements:
-
Toolbar: Across the top edge of the interface, you’ll see a toolbar with several controls. We’ll explore this once we’ve finished setting up.
-
Project panel: On the upper left side of the interface you’ll see the Project panel, used to manage project files.
-
Type Browser panel: On the lower left side of the interface you’ll see the Type Browser panel, used to manage database schemas.
-
Text editor: The main space is occupied by the text editor, used to write and execute queries.
Setting up
Open a project
To begin with, we’ll need to open a project. Click the Open Project button in the Project panel to open the project directory window.
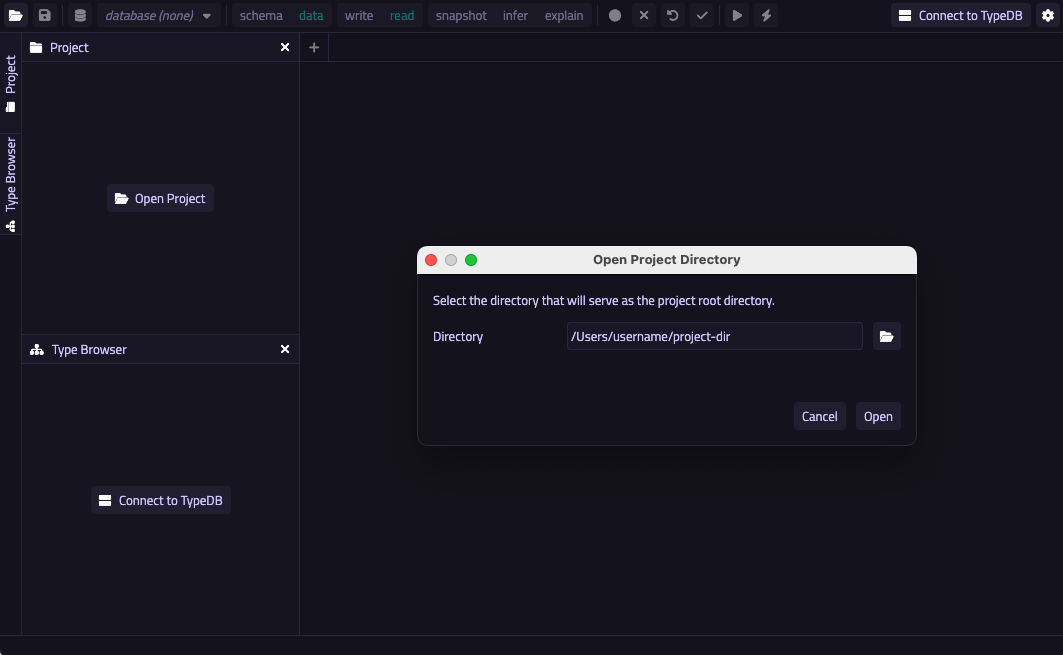
Choose a directory in which to save your project files and click the Open button. You should now see a file tree in the Project panel.
Connect to the server
Next, we’ll connect to the server. Click the Connect to TypeDB button in the Type Browser panel to open the server connection window.
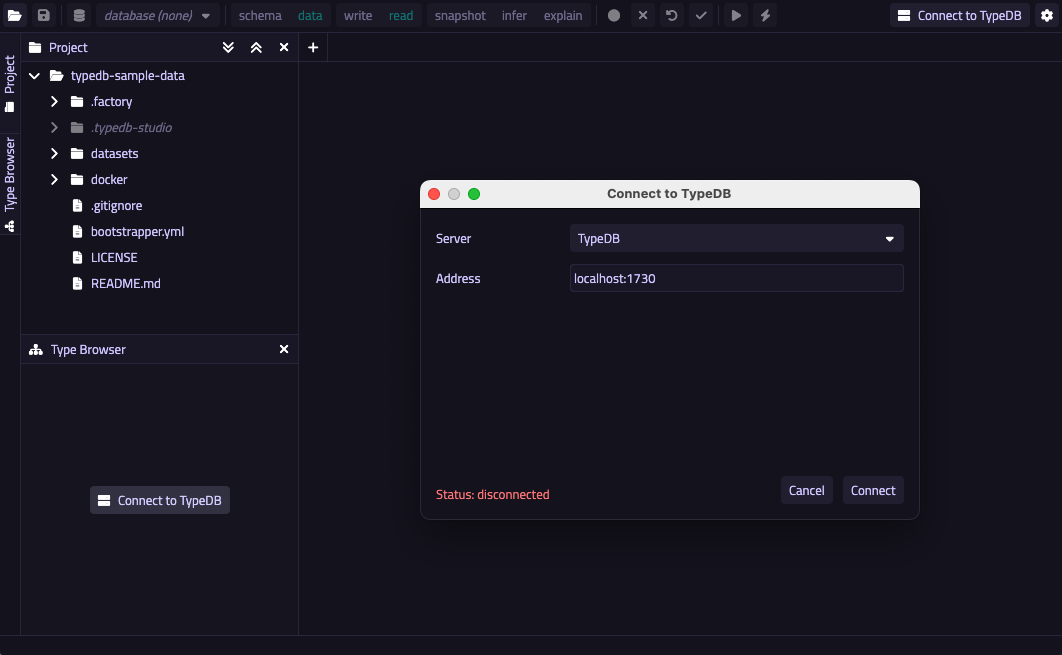
Select TypeDB from the Server dropdown, enter localhost:1730 into the Address box, then click the Connect button. If Studio connects successfully, you should see the address displayed on the top-right of the toolbar. If Studio fails to connect, ensure that the Docker image we started in Lesson 2.1 is running and available at the expected address.
Select a database
After connecting to the server, the button in the Type Browser panel will update to read Select Database. Click on it to open the database selection window.
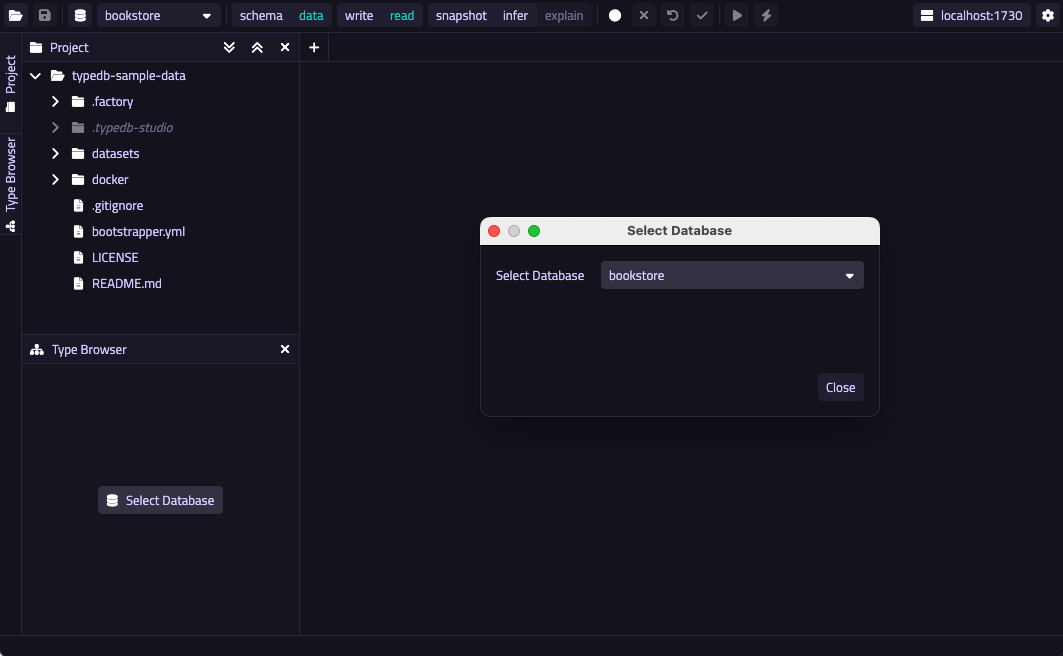
The dropdown menu will display a list of databases on the server. Select the bookstore sample database and click the Close button. The Type Browser should update to show the list of types in the sample database.
We’re now ready to begin running queries.
Executing queries
Overview of controls
To begin with, let’s review the controls on the toolbar.

The following controls will be important throughout this course.
| Name | Control | Description |
|---|---|---|
Database manager |
|
Use this button to open the database manager. From there, you can create and delete databases. |
Database selector |
|
Use this dropdown menu to select a database to work with. Unless the course material says otherwise, we’ll be working with the |
Session switch |
|
Use these buttons to toggle between schema and data sessions. The course material will tell you when to switch session types. For now, switch to a data session. |
Transaction switch |
|
Use these buttons to toggle between write and read transactions. The course material will tell you when to switch transaction types. For now, switch to a read transaction. |
Inference toggle |
|
Use this button to toggle rule inference on and off. For now, make sure it’s switched off, otherwise you may get back unexpected query results. We’ll explore rule inference in Lesson 3.3. |
Close transaction |
|
Use this button to close an open write transaction without committing the changes to the database. |
Commit transaction |
|
Use this button to commit an open write transaction, persisting the changes made. |
Run query |
|
Use this button to run the query displayed in the text editor. If the transaction toggle is set to "write", this will open a transaction which must then be closed or committed. |
The remaining toolbar controls will not be necessary for the majority of this course. A full overview of all controls can be found on the Studio page of the TypeDB Manual.
Running a test query
Let’s try running a query. To start off, ![]() open a new window in the text editor and paste in the following query.
open a new window in the text editor and paste in the following query.
match
$book isa paperback, has isbn-13 "9780446310789";
fetch
$book: title, page-count;
Ensure the session toggle is set to a data session and the transaction toggle is set to a read query, then ![]() run the query. You should see the following result.
run the query. You should see the following result.
{
    "book": {
        "page-count": [ { "value": 281, "value_type": "long", "type": { "label": "page-count", "root": "attribute" } } ],
        "title": [ { "value": "To Kill a Mockingbird", "value_type": "string", "type": { "label": "title", "root": "attribute" } } ],
        "type": { "label": "paperback", "root": "entity" }
    }
}
If you see this result, you’ve set up everything correctly and are ready to begin learning how to read data in Lesson 3.